Using Infrared Imaging for Composite Inspection
How is thermal imaging used in composite inspection solutions?
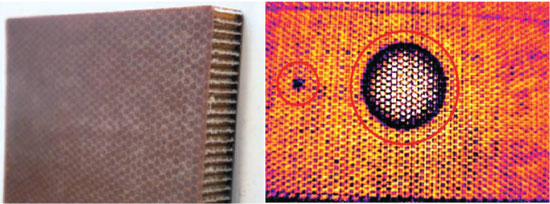
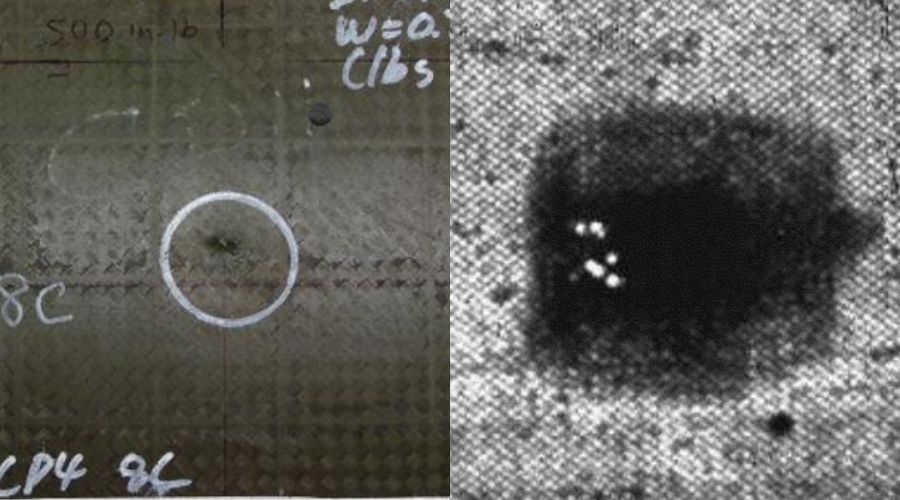
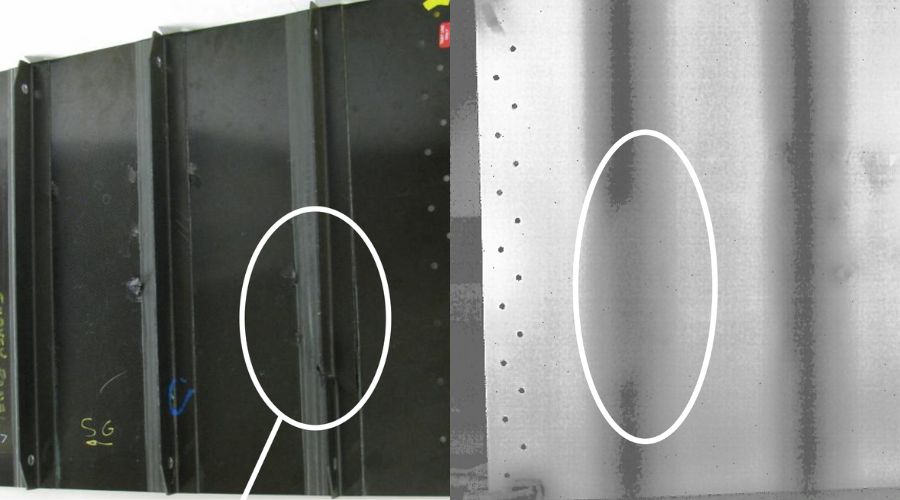
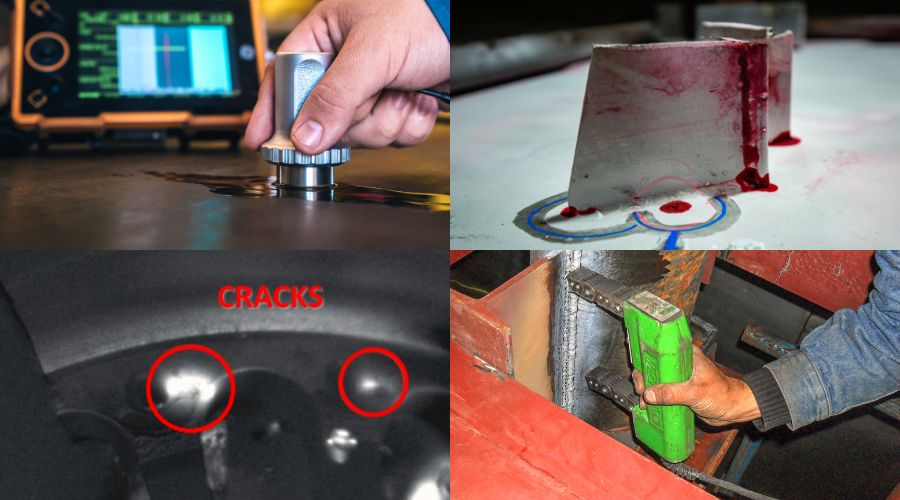
Honeycomb material with a lock-in result image shows circular delaminations, circled in red.
In this article, we break down the four subcategories of infrared nondestructive testing for the use of composite inspection solutions.
The first documented use of composite materials was most likely in ancient Egypt during the time of the Pharaohs. Workers were using straw and mud to make building materials. When talking about composite materials today, one usually refers to advanced materials used either in aerospace, military, and racing or automotive applications. Recently, one of the biggest boosts for using composite materials has been commercial aircraft manufacturers such as Boeing with the Dreamliner B-787 and Airbus with the A350.

The Airbus A350 has been designed with more than 50% composite materials. Source: Airbus
In an attempt to make these super liners more fuel efficient, both companies have designed more than 50% of these aircrafts out of composite materials. With these large scale composite structures also comes a significant need for nondestructive material testing (NDT), both for manufacturing as well as in-service inspection.
Traditionally, this need has been fulfilled with ultrasound NDT. However, many parts for these aircraft are being manufactured with complex shapes and curvatures, making it difficult or impractical to use ultrasound sensors which need to be positioned true (orthogonal) to the surface of the material being inspected.
Thermal imaging is not as widespread as ultrasound inspection in the NDT world, although it has many advantages when it comes to large scale composite materials with complex shapes. Thermographic NDT techniques fall into the category of active thermography, due to use of an active heat excitation source. There are four subcategories of thermal or infrared (IR)-NDT that are used for composite inspection solutions: flash, transient, vibro-thermography and lock-in thermography.
Flash Thermography
Flash, sometimes also called pulse thermography, uses a very short pulse of energy, such as provided by a Xenon flash lamp, as the active excitation for the measurement. An infrared or thermal camera is then used to record an image sequence of the heat up and cool down period of the material.
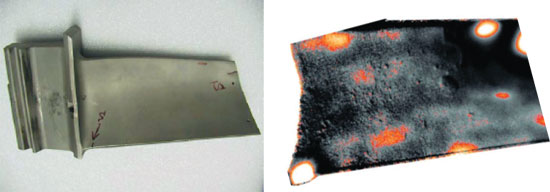
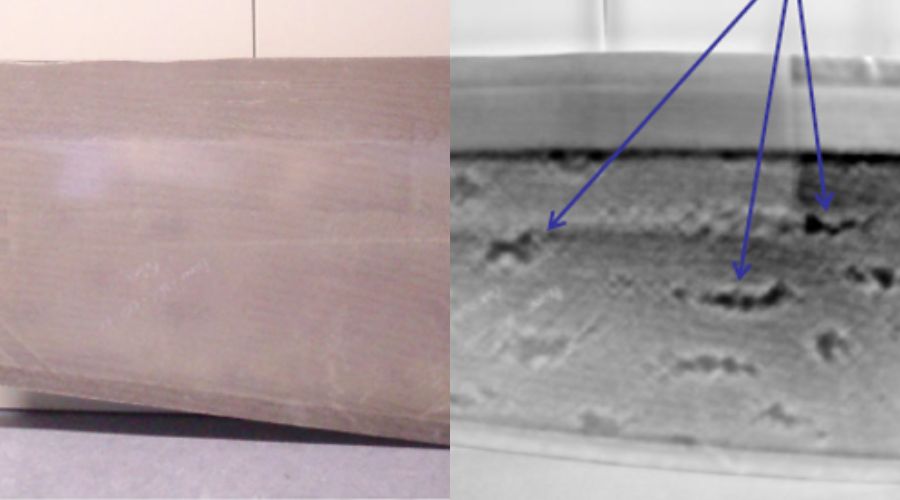
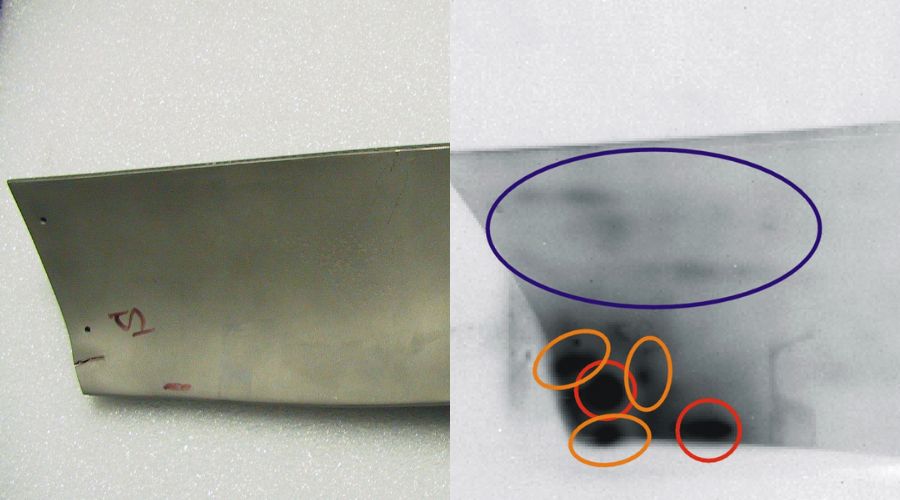
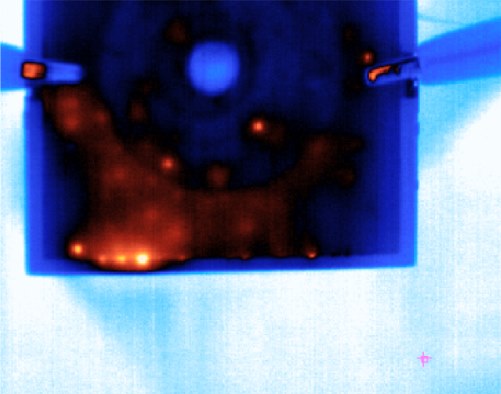
The orange spots on this lock-in image result image of a turbine blade show micro-cracks, some beneath the surface.
When observing the thermal wave on the surface of the material during this period, defects such as impact damages, voids, foreign material inclusions, disbands and water inclusions manifest themselves with their varying thermo-physical properties compared to the intact or defect-free material.
These thermo-physical differences create disturbances or interferences in the surface thermal wave, which the thermal camera records. These image sequences can contain up to multiple hundreds of thermal images. The analysis software then calculates a result image that based on the applied algorithm may be displayed as a phase angle image.
Vibro-Thermography
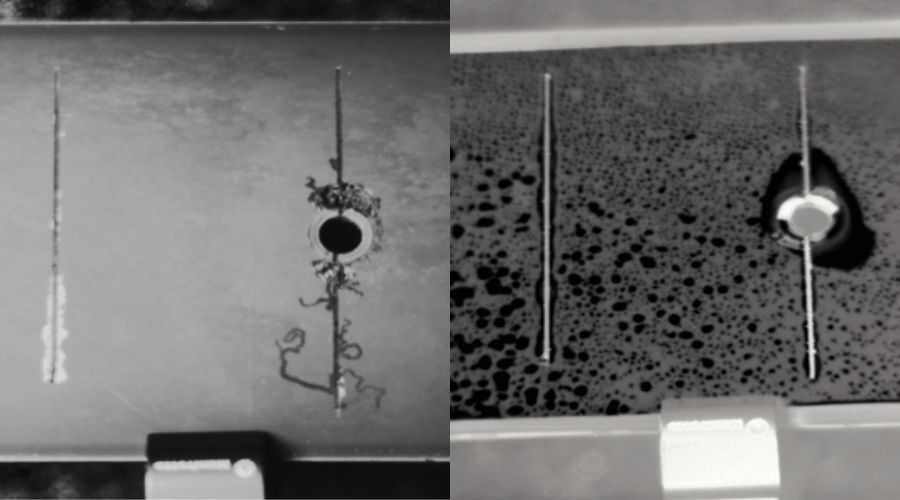
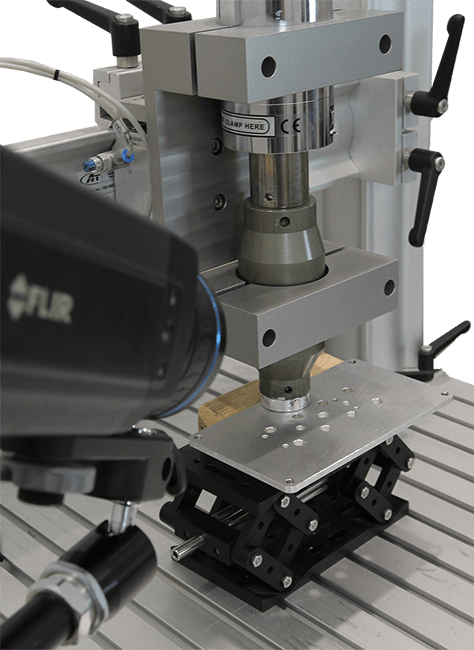
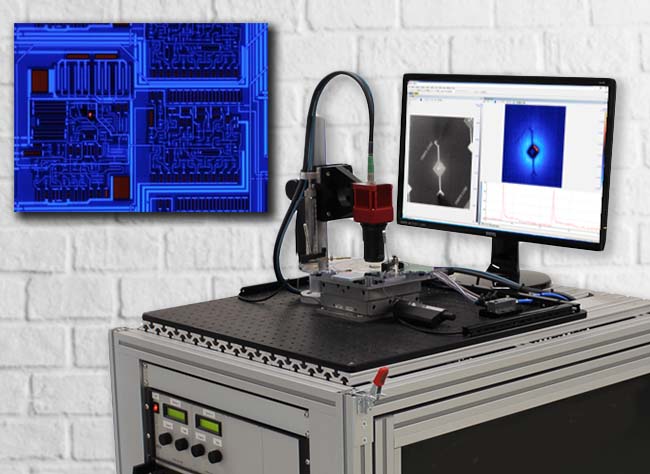
In a vibro-thermography system, induced ultrasound waves are used to create friction and therefore heat on crack surfaces inside or on the surface of the material. This friction heat can then be seen with the help of the thermal camera. Typical applications for such a vibro-thermography system are the inspection of ceramics and metals for cracks and micro-cracks.
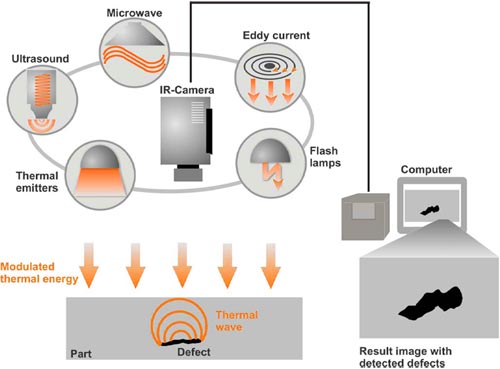
The principle measurement setup is shown here.
Lock-In Thermography
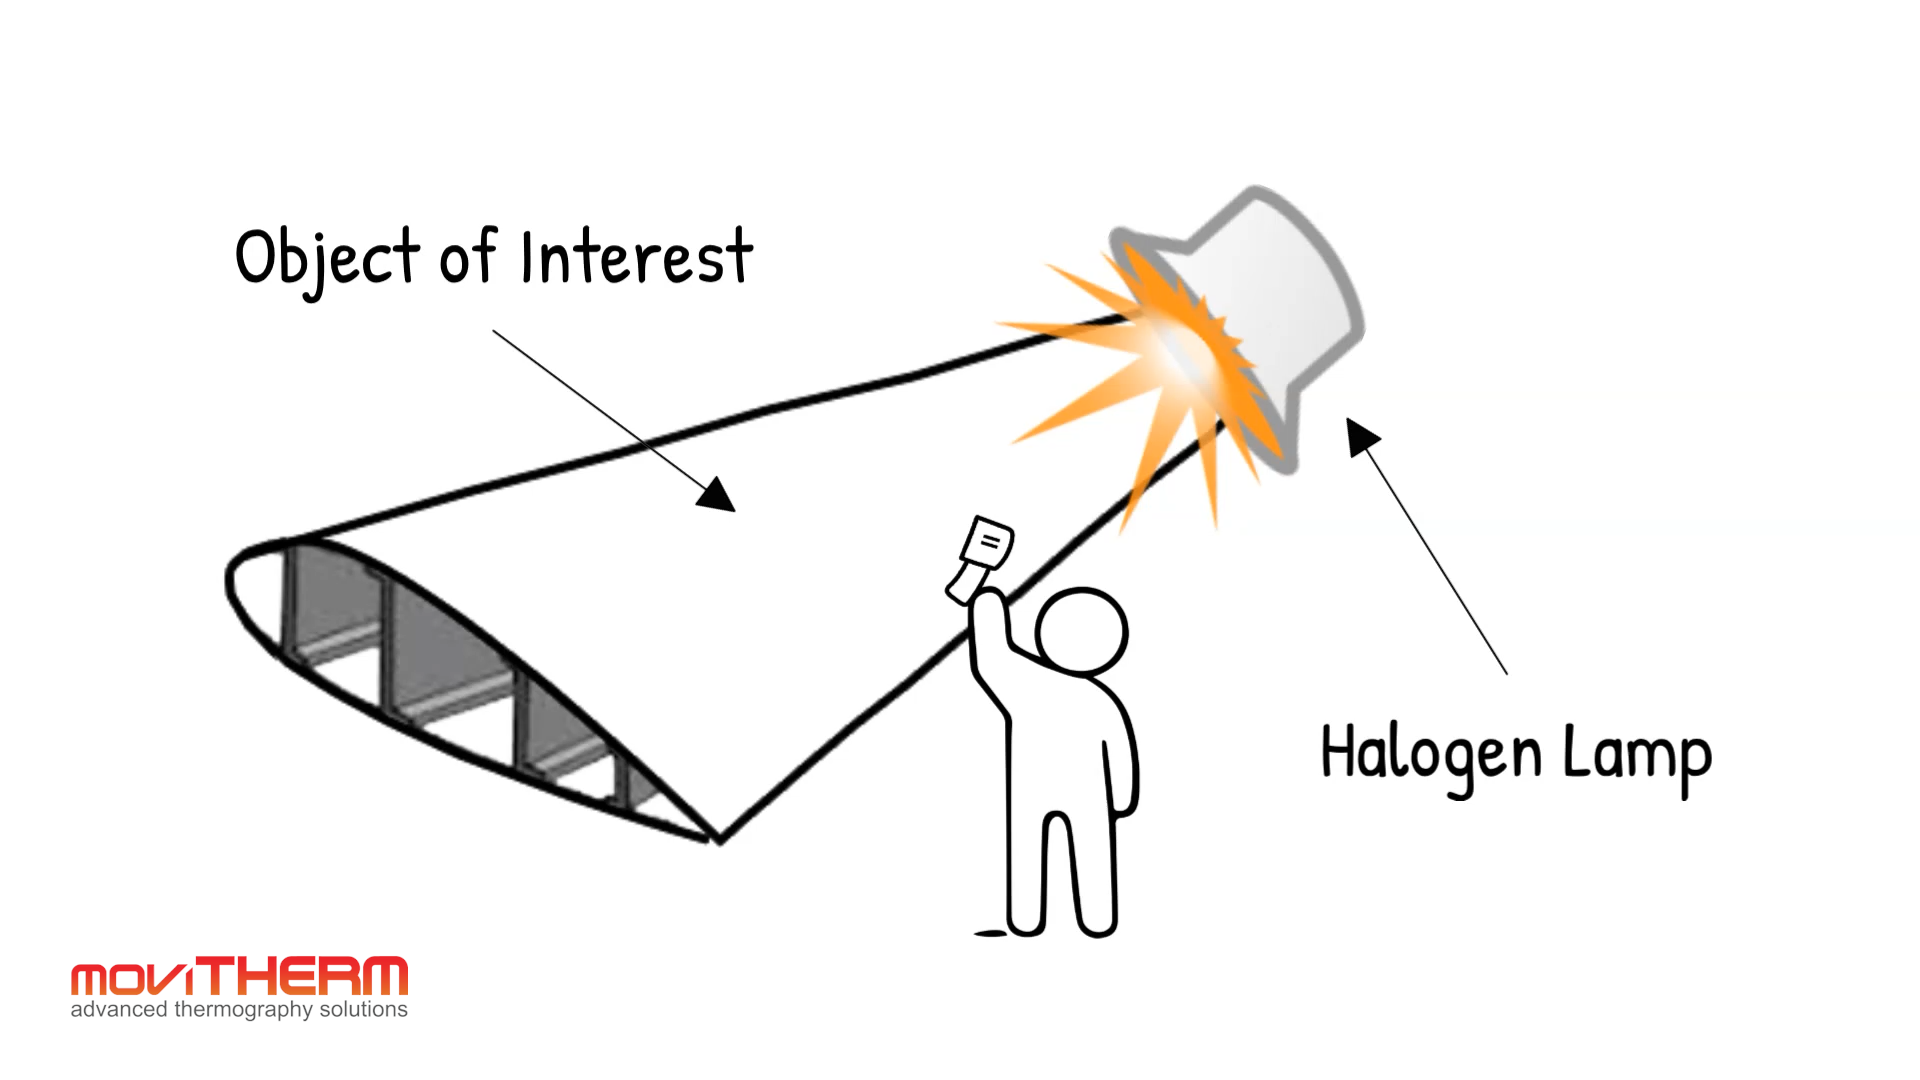
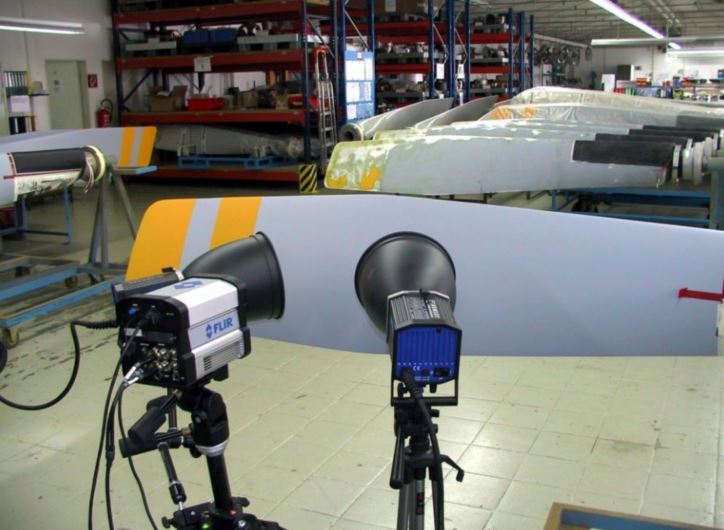
One of the more sophisticated thermal NDT methods available is lock-in thermography. A typical measurement setup for composite NDT using a lock-in thermography system usually involves halogen lamps for excitation.
The underlying principle is based on “locking in” the camera recordings on the known excitation frequency. The sample materials can thereby be excited continuously by using a sinusoidal waveform for modulation of the halogen lamp or lamps. This has the distinct advantage that the heat or thermal wave never decays to the point where the camera can no longer pick up the heat signature.
For instance, with flash or transient thermography a singe and finite heat pulse is used for excitation. The collection of useful thermal images ends at the latest, when the amplitude of the thermal wave approximates the noise floor of the camera detector. This in turn limits the maximum achievable penetration depth of the measurement. This is particularly critical in composite materials, which usually do not conduct heat as well.
Lock-in thermography uses Fast Fourier Transform (FFT) algorithms for calculation of the result image. The image data is evaluated on a pixel-by-pixel basis in the frequency domain and it only allows for signals to be evaluated that are an exact frequency match to that of the excitation source, thus eliminating undesirable thermal reflections.
In fact, since the frequency of noise of the measurement system is random, this method allows for an increase of the thermal sensitivity that reaches below the noise floor of the camera itself. This significantly improves the signal-to-noise (SNR) ratio of a lock-in thermography system, allowing for detection of tough-to-find defects, compared to IR-NDT methods.
The typical thermal sensitivity of a cooled IR-camera is around 25 millikelvin (mK). A lock-in thermography system can extend that range down to the µK range, or by a factor of 100 to 1,000.
Other application examples for using lock-in thermography are thermal stress analysis for nondestructive evaluation of material strengths and shunt detection for photovoltaic (solar) cells and panels.
About moviTHERM
moviTHERM – Advanced Thermography Solutions was founded in 1999. The company offers solutions for plastic welding, package sealing, and non-destructive testing. In addition, moviTHERM provides IoT Cloud monitoring solutions for thermal imaging applications for early fire detection, machine condition monitoring, and other applications. moviTHERM is a Teledyne Flir Premium Partner and master distributor for FLIR Thermal Cameras for automation and science applications.

