About MoviTHERM

This author has not yet filled in any details.
So far MoviTHERM has created 157 blog entries.

How to grab an image from a FLIR A615 using LabVIEW

Grab an Image from a FLIR A615 Using LabVIEW

How to grab an image and display the absolute temperature from the thermal camera FLIR A615 using LabVIEW from National Instruments.

The following instructions are intended to provide some beginner level advice and it is a “Hello World” example and a first step in how to capture a thermal image from a FLIR A615 using LabView. The FLIR A615 has a Gigabit Ethernet interface and supports the world-wide machine vision standard GeniCAM.

FLIR A615

Download the source code: FLIR_A615_using_LabVIEW.zip (257 KB)

Here is what you will need for this to work:

  • A PC with a LabVIEW development environment installed.
    • LabVIEW 2015 or later
    • NI Vision Development Module 2015 or later
    • IMAQdx 15.5 or later
  • FLIR A615 Thermal Camera connected to PC via Ethernet Cable
FLIR A615 LabVIEW Image Display Frontpanel

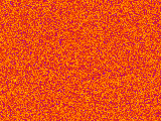
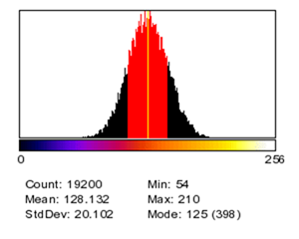
The above is a screenshot of the LabVIEW front panel. In the center is the image display, showing a black and white thermal image of a coffee mug. The brighter the intensity, the higher the temperature. The mouse cursor was placed in the center of the cup. The temperature is superimposed onto the image. The outside of the coffee mug is 64.46 degrees Celsius in this example. Also noticeable is that the image of the mug creates a reflection on the table surface. The surface is reflective in the long wave thermal band that the camera is sensitive to (8 to 14µm).

When you run the VI, it will connect to the camera. This assumes that the camera’s IP address and subnet mask matches the PC’s settings. Instructions on how to do this would go beyond the scope of this example. Once connected, you should see a thermal image after a few seconds. When you hover your mouse pointer over the image, it will display the temperature right next to it and also update the thermometer indicator to the right of the image.

Image Grab and Temperature Measurement from FLIR A615 using LabVIEW


The image below is the block diagram of the code that belongs to the front panel above.

LabVIEW FLIR A615 image grab block diagram

Here is how is works:

A: Open Camera VI
This VI will query attempt to connect to the selected camera. It will load the camera configuration file and create a unique reference to the camera

B: Property Node
This property node configures the camera settings via GeniCAM as follows:

1) Pixel Format:
Sets the pixel format to either 8-bit or 16-bit. In this example 16 bit format is chosen

2) IR Format:
This will give the temperature value in 10mK from the camera.

3) IR Frame Rate:
This attribute will set the frame rate of the camera. Currently it is set to 50Hz

C: IMAQdx Configure Grab VI
Sets the camera up for grabbing images.

D: IMAQ Create VI
Is used to create a reference in memory to store the images, streaming from the camera

E: IMAQdx Grab2 VI
Is used acquire the most recent frame from the given memory location

F: IMAQ ImageToArray VI
Is used to convert the image to a 2D array

G: This function converts from 10mK to Celsius (Note: this can be replaced to calculate the temperature to Fahrenheit)

H: This property node will extract the location of the mouse cursor in the image

I: Index Array VI
Is used to extract the temperature at a given location of the mouse pointer and display it on the front panel

J: IMAQ Clear Overlay VI
Is used to remove the previous overlay

K: IMAQ Overlay Text VI
Is used to write the temperature value at the location of the mouse pointer

L: IMAQ Dispose VI
Is used to clear the memory that was allocated to store the image

M: IMAQdx Close Camera VI
Is used to close the unique reference that was created to communicate with the camera

2024-08-30T15:53:05-07:00Thursday, March 21, 2024|Support|

What is NETD in a Thermal Camera?

NETD in a Thermal Camera

NETD explained

You may come across the expression or specification of “NETD” when you look at the technical details of a thermal camera. The expression stands for “Noise Equivalent Temperature Difference”. It is a measure for how well a thermal imaging detector is able to distinguish between very small differences in thermal radiation in the image. NETD is typically being expressed in milli-Kelvin (mK). It is also sometimes referred to as “Thermal Contrast”. When the noise is equivalent to the smallest measurable temperature difference, the detector has reached its limit of its ability to resolve a useful thermal signal. The more noise there is, the higher the NETD value of the detector.

Typical values for uncooled, micro-bolometer detector thermal cameras are on the order of 45 mK. Scientific cameras with photon based and cryogenically cooled detectors can achieve NETD values of about 18 mK. The noise measurement value should be specified at a particular object temperature, as this impacts the measurement. Example: NETD @ 30C : 60 mK

How is NETD being measured?

In order to measure the noise equivalent temperature difference of a detector, the camera must be pointed at a temperature controlled black body. The black body needs to stabilize before starting the measurement. The noise equivalent temperature difference is then being measured at a specific temperature. It is not a single snapshot measurement, but rather a temporal measurement of noise.

The image on the left shows a noisy thermal image that the camera produces when looking at a very uniform black body during the measurement. The image on the right shows a histogram of all pixel values taken from several images over time. It is a temporal distribution of noise at that temperature. The NETD value is the standard deviation of that histogram (STDEV) converted into mK.

How does NETD affect the measurement?

The images below show the same scene recorded by two different cameras. One camera has an NETD of 60 mK and the second has value of 80 mK. The areas in the image with very low temperature show significantly more noise in the image taken with the 80 mK camera. 20 mK difference doesn’t seem like much, but it has a potentially huge impact on the image quality and measurement accuracy.

NETD thermal image comparison

What affects NETD?

Several factors can affect NETD. Thermal cameras sometimes come with more than one calibrated temperature measurement range. The noise reading can vary based on the selected range and also the object temperature. As long as there is significant thermal contrast in the image and the temperature of interest is a lot higher than the background temperature, then this won’t affect the measurement accuracy much. The noise level can also be affected by the detector and/or camera temperature. If the camera is exposed to a high ambient temperature, the system noise may increase. This depends on how well the camera is internally stabilized. The effects of this internal temperature drift can be observed in between non-uniformity calibrations or ‘NUCs’, which can be several minutes apart. Another variable that can affect NETD is the #f-stop of the lens. The #f-stop or aperture of the lens determines how my thermal radiation reaches the detector. Generally, a lower #f-stop will lead to a better noise value.

Do you have more questions? Are you working on an application that might benefit from thermal imaging? Let us know! Chat with us! Contact us to talk with an engineer!

2024-08-16T17:29:15-07:00Thursday, March 21, 2024|Blog|

Semiconductor Failure Analysis Using Thermal Imaging

Semiconductor Failure Analysis Using Infrared NDT

Solar Cell Lock In Electroluminescence NDT Solutions

MoviTHERM’s Semi-CHECK solutions allows the detection of shorts and other defects in semiconductors. This system uses a FLIR Thermal camera with microscopic lens attachment in order to provide the correct magnification. Lockin Thermography allows to detect defects with nano-watt to micro-watt signatures.

More info about MoviTHERM Semi-Check

Download Our Starter Guide

For Infrared NDT Systems

Infrared Non-destructive Testing Guide
  • Learn how Infrared NDT works

  • Learn what type of defects you can find

  • Learn how large of an area you can inspect

  • Learn how this method compliments UT inspections

  • Learn how to save valuable inspection time

2024-08-16T17:29:25-07:00Thursday, March 21, 2024|Blog|

Solar Cell Lockin Electroluminescence

Solar Cell Lockin Electroluminescence Using Infrared NDT

Solar Cell Lock In Electroluminescence NDT Solutions

MoviTHERM’s Solar-CHECK solution allows for inspection of solar cells. This particular method examines the electroluminescense when using electrical excitation of the cell.

Download Our Starter Guide

For Infrared NDT Systems

Infrared Non-destructive Testing Guide
  • Learn how Infrared NDT works

  • Learn what type of defects you can find

  • Learn how large of an area you can inspect

  • Learn how this method compliments UT inspections

  • Learn how to save valuable inspection time

2024-08-16T17:29:36-07:00Thursday, March 21, 2024|Blog|

What is Lock-In Thermography?

Lock-In Thermography NDT Technique

The principle of lock-in thermography is based on the application of a periodic input energy wave (i.e. thermal emitter, ultrasound, microwave, eddy current, flash or xenon lamp, halogen lamp, or laser) to the surface of the object being examined and analyzing the resulting local temperatures on the surface of the object.

When the input energy wave penetrates the object’s surface, is it absorbed and phase shifted. When the input wave reaches areas within the object where the thermophysical properties are not homogeneous in relation to the surrounding material, (i.e. at delaminations or inclusions), the input wave is partially reflected.

The reflected portion of the wave interferes with the incoming input wave at the surface of the object, causing an interference pattern in the local surface temperature, which oscillates at the same frequency as the thermal wave.

The internal structure of the object being examined can then be derived by evaluating the phase shift of the local surface temperatures in relation to the input energy wave. The ability to derive internal thermophysical inconsistencies within the object, however, requires that the input energy source be used at an optimal frequency, which depends on both the thermophysical characteristics of the object as well as its thickness.

Lock-In Thermography

The principle measurement setup is shown here.

MoviTHERM Lock-In Thermography NDT Solution

MoviTHERM Lockin Thermography Non-Destructive Test System. This system is a Lockin Thermography System used for defect detection in materials, such as composites, metals and non-metals. Lockin Thermography allows the detection of some very weak signals even below the noise floor of the camera in the micro-Kelvin range. This ability makes this method the perfect candidate for locating tough to find material defects.

In this video we explain the application of the Lock-In Thermography method using a FLIR camera and an irNDT system.

Download Our Starter Guide

For Infrared NDT Systems

Infrared Non-destructive Testing Guide
  • Learn how Infrared NDT works

  • Learn what type of defects you can find

  • Learn how large of an area you can inspect

  • Learn how this method compliments UT inspections

  • Learn how to save valuable inspection time

2024-08-16T17:29:45-07:00Thursday, March 21, 2024|Blog|

What software is compatible with the FLIR AX8?

Software Compatible with FLIR AX8

The following is a list of software compatible with the FLIR AX8 camera


Software Support Comment
FLIR IP Config

Note
The FLIR IP Config version must be
1.9 or later.
Yes
  • Detecting FLIR AX series cameras on the network.
  • Assigning IP addresses.
  • Accessing the built-in camera web server.
Camera web server Yes Configuration and setup of analysis and alarms.
FLIR Tools/Tools+ No
FLIR IR Monitor No
EthernetIP & Modbus TCP Yes Connecting to a PLC for readout of analysis and alarms.
Pleora Ebus SDK No
FLIR GEV Demo No
ThermoVision System Developers Kit No
ThermoVision LabVIEW Digital Toolkit No


2024-08-30T15:52:53-07:00Thursday, March 21, 2024|Support|

Solar Cell Inspection Using Thermal Imaging

Solar Cell Inspection Using Infrared NDT

MoviTHERM’s Solar-CHECK solution uses lockin thermography to inspect for electrical shunts and other defects in thin-film as well as in thick-film photo-voltaic cells. The cells can either be excited electrically or optically.

Download Our Starter Guide

For Infrared NDT Systems

Infrared Non-destructive Testing Guide
  • Learn how Infrared NDT works

  • Learn what type of defects you can find

  • Learn how large of an area you can inspect

  • Learn how this method compliments UT inspections

  • Learn how to save valuable inspection time

2024-08-16T17:29:54-07:00Thursday, March 21, 2024|Blog|

Performing a Thermal Camera Calibration

How to Perform a Thermal Camera Calibration

Thermal Camera Calibration

We often get asked if the calibration of an infrared or thermal camera can be performed in the field, by the customer. While this question appears straight-forward, further clarification is necessary in order to avoid confusion. Some infrared cameras are inherently not temperature calibrated by the manufacturer. The purpose of these cameras is to simply distinguish between the hot and cold regions of a scene,  in relative terms. Typically, these types of cameras output a black and white or monochrome image for surveillance applications. We also refer to these applications as performing a qualitative inspection vs. a quantitative inspection. On the other hand, there are temperature calibrated, true thermography cameras, that are being used to perform absolute temperature measurements. These are calibrated at the factory and need to be re-calibrated from time to time. So, the question about calibration really becomes a two-part question. The first part is this: Is the camera a calibrated, thermography camera, or an uncalibrated IR camera? Assuming calibration is an option for your camera, then we can move on to the second part of the question

Can I (re-)calibrate a thermal camera myself?

The factory calibration of a thermal camera is usually good for up to one year. Depending on the purpose of the camera and your company policy on maintaining calibrations for equipment, you may have to account for getting your thermal camera re-calibrated. Unfortunately, this calibration can only be performed by the camera manufacturer.

There are several reasons for this. In order to calibrate a thermal camera, one must perform a multi-point calibration. In other words, multiple temperature samples, spanning the entire temperature range of the camera, need to be presented to the camera in succession. The camera detector, readout electronics, and lens will experience temperature drift due to heat dissipation during the calibration. This would create errors during the calibration that may exceed the specification of the camera. Using just one or two black bodies wouldn’t suffice, since the settling time of any black body would most likely exceed the time one should take for the calibration in the first place. In practice, manufacturers mitigate the potential issues by using an array of black bodies programmed at different temperature points across the desired temperature range of the camera. A robotic arm can then quickly move the camera from black body to black body, thus greatly reducing the time that the camera has to wait before calibrating the next temperature point.

The photo on the left shows a calibration laboratory designed for that purpose. In addition, the manufacturer has to save the calibration values in the non-volatile memory of the camera’s electronics. An end-user usually does not have access to that part of the camera. These are just some of the reasons why an end-user cannot perform a re-calibration of a thermography camera.

Can I add temperature calibration to an infrared camera?

Looking back to the first part of the question, suppose you have an uncalibrated infrared camera. What are your calibration options in that case? There is a significant cost difference between an infrared camera and a calibrated thermography camera. Hence, technology-savvy folks are often wondering, why they couldn’t just use a thermocouple and perform a two-point calibration. One point at the lower end of the temperature range and one at the upper temperature range. Then just map the intensity values of the camera to these two points and voila – we have a temperature calibrated camera. Well, in reality, it isn’t that simple.

Here is why:

First, as we have learned from the setup of the calibration laboratory, a multi-point calibration is necessary to get any sort of accuracy out of a camera. This is due to the non-linearity in the detector and possibly other parts of the electronics. A multi-point lookup table is required in combination with some complex curve fitting and some other secret sauce in order to extract accurate temperature readings from a thermal camera.

To make matters worse, there is also temperature drift. The detector experiences different temperatures, partially due to ambient temperature changes, partially due to heat dissipation of the camera electronics. The same is true for the lens as well as the readout electronics. All these constantly varying temperatures need to be measured and compensated for. One mechanism that performs this job is the ‘NUC’ flag. NUC stands for non-uniformity calibration. It is a miniature black body that regularly drops in front of the detector, making a clicking noise when activated. The camera assumes that this flag has a uniform temperature and corrects for any drift internally. This correction in turn also impacts the temperature measurement and its drift and stability.

A simpler infrared camera, that was never intended to measure absolute temperature, usually does not have all the provisions necessary to perform all these corrections. What you would end up with when trying to use this sort of camera as a temperature measuring device, is a very unstable, constantly drifting “guessing” device.

2024-08-30T16:05:03-07:00Thursday, March 21, 2024|Blog|
Go to Top