Vibro Thermography NDT Technique
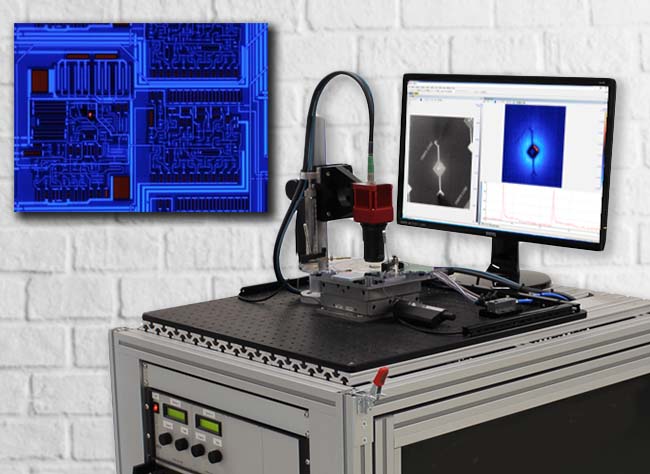
Vibro-Thermography is an active thermography method that uses mechanical vibration to locate cracks. It is considered an active thermography method because this method does not rely on existing heat being present in the part that is being inspected. Vibro-Thermography uses ultrasonic frequencies to excite the specimen. These ultrasonic frequencies are typically in the range of 20,000 to 45,000 Hz or 20kHz to 45kHz. A common excitation source for creating these vibrations is an ultrasonic welder.
Vibro-Thermography belongs to the non-destructive test methods. It is the only one that is not non-contact since the ultrasonic horn or transducer needs to be in contact with the workpiece. During the measurement, these vibrations propagate through the part. If a crack is encountered, the crack surfaces rub together from the vibration. The friction from these vibrations creates a small heat signature that the thermal camera can detect.
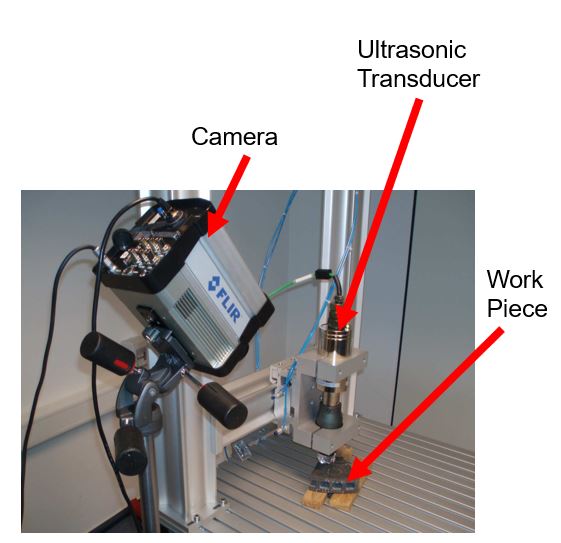
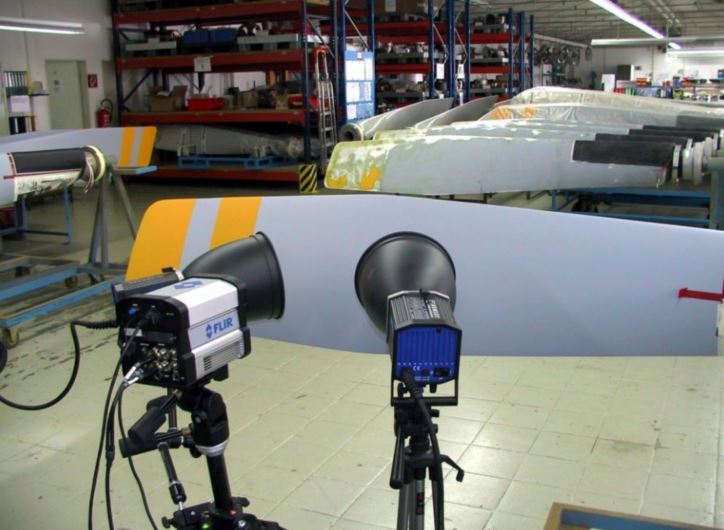
Vibro-Thermography Setup
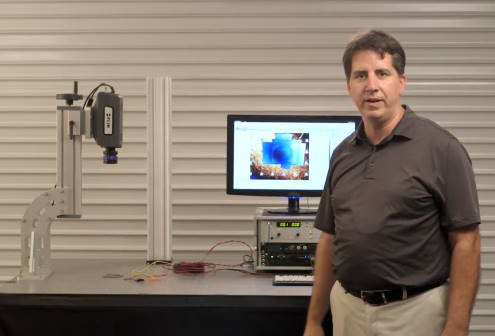
The photo above shows a Vibro-Thermography measurement setup. The setup consists of a high-speed thermal camera, an Ultrasonic Transducer with Power electronics (not visible) and a workpiece.
The ultrasonic transducer is placed onto the workpiece. An ‘H’-style gantry allows the transducer to be lowered with the assistance of a pneumatic motion stage. The pressure for the stage is adjustable and allows for variation of the contact pressure for the transducer. A softer coupling medium is used to avoid scratching the part. The medium used in this example is a piece of aluminum foil.
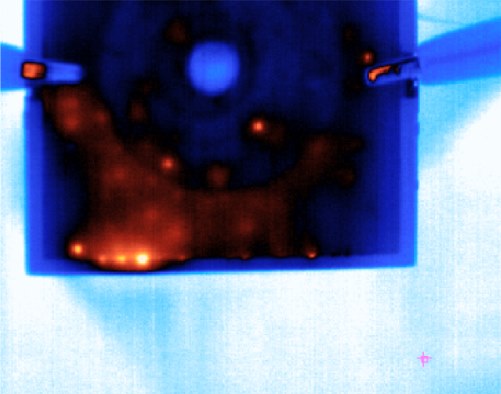
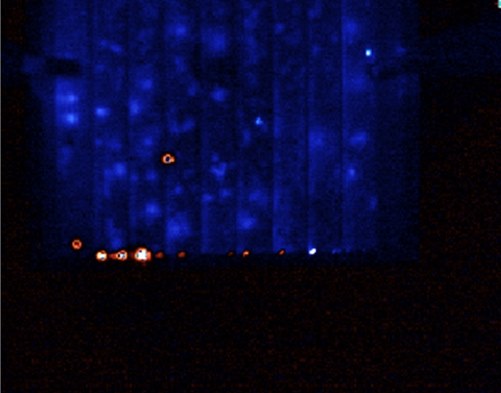
Upon excitation of the part, in this case, a piece of a brake rotor, any cracks will show up as local increase in temperature. The workpiece is propped up on a couple of pieces of wood to decouple the vibration from the work surface.
Performing vibro-thermography on metal parts typically requires a very fast thermal camera. Fast in this context refers to the integration time of the detector as well as the frame rate of the camera. This is due to the heat conductivity of metals. Any small increase in temperature around the crack surfaces will dissipate within milliseconds.
Cracks covered by the ultrasonic transducer won’t be visible. There is a considerable amount of energy being coupled into the workpiece from the transducer. It is therefore normal to see the area around the transducer to warm up. This warm up is not indicative of a defect or crack, but rather the vibrations and resulting friction between the transducer and the workpiece.
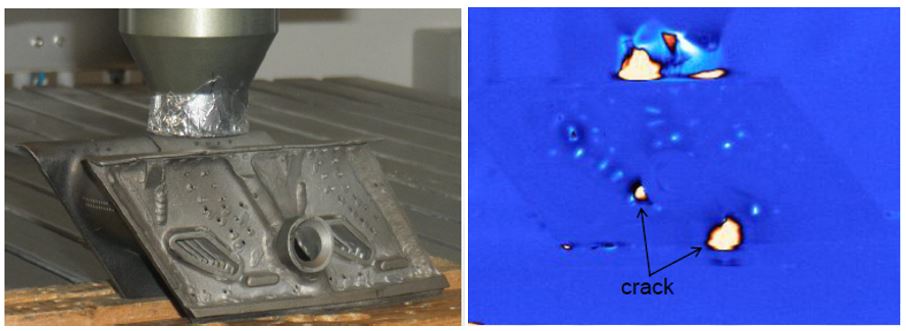
Crack detection on turbine blade.
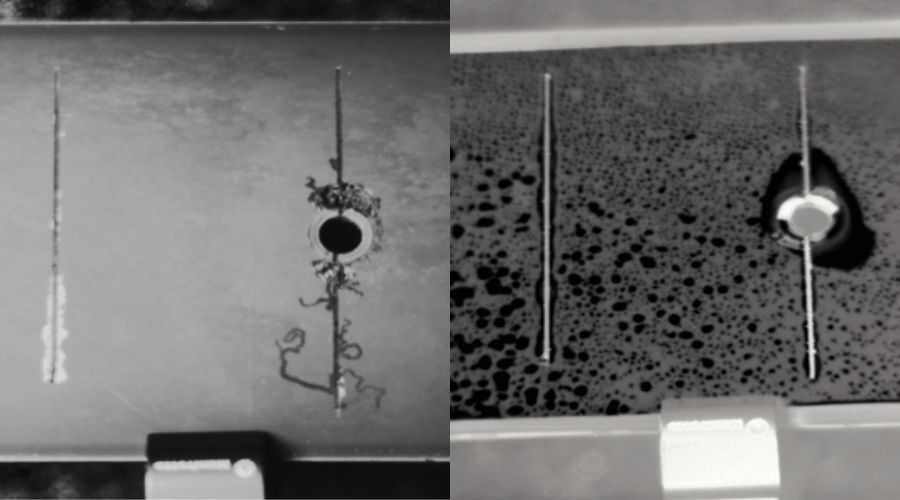
These two images show a Titanium turbine blade being inspected for cracks. Vibro-Thermography is a very useful method for crack detection. The turbine blade is placed on top of some wood and the ultrasonic transducer is wrapped in aluminum foil.
The image on the right has been artificially post-colored with a thermographic color palette. Cold regions appear in blue and warm regions in orange to bright yellow.
There are two cracks that are clearly visible. One big advantage of using Vibro-Thermography is that even complex-shaped parts can be inspected.
The standard non-destructive test method most commonly used in the industry is dye penetrant testing. For that method, it is required to brush a liquid dye onto the part and let it seep into possible crack surfaces. Then the part is being washed. The dye usually stays in the crack and starts to fluoresce when excited with a UV or black light. The drawback of this method is, that it is time-consuming and messy. Dye penetrant testing also cannot detect sub-surface or buried cracks, as there is no chance for the dye to penetrate into the crack.
Vibro-Thermography is better suited in this case, since it even detects near-surface, buried cracks. It can also detect micro-cracks. The thermal conductivity of the part makes the crack surface light up in the thermal camera image. It also enlarges the size due to the thermal bleed or blooming effect. The heat generated by the crack surface diffuses into the surrounding area of the material, thus enlarging the appearance of the crack size. This in turn helps with the detection of micro-cracks.
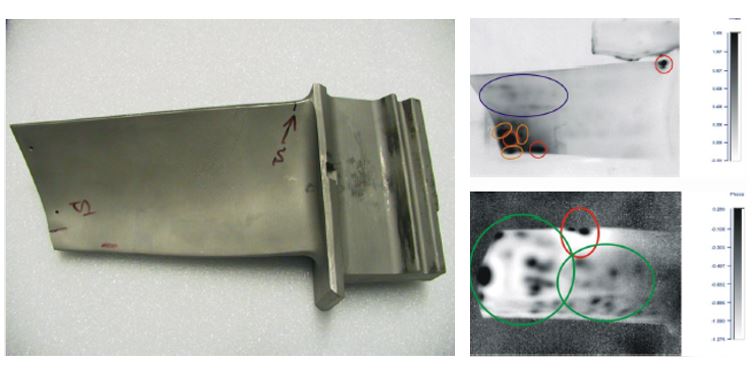
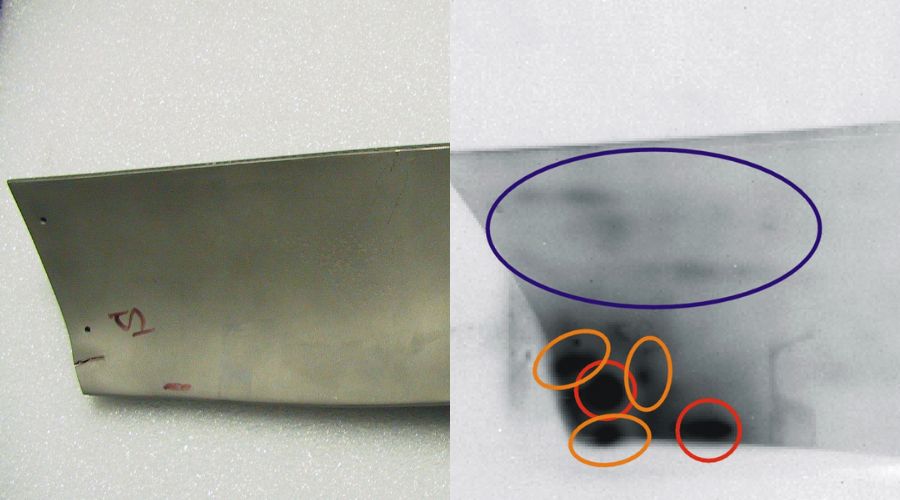
Micro cracks in a turbine blade.
This example shows a different kind of turbine blade. This blade had been previously inspected with the dye penetrant method. The cracks found are marked with “S” and some black lines.
After inspecting the same turbine blade with vibro-thermography, the actual level of defects and cracking became apparent. The color palette chosen for these two result images is a grayscale palette. Cracks show up as dark spots.
As can be seen in the result image – especially in the lower image – the turbine blade is riddled with sub-surface micro cracks. This level of cracking could have led to a catastrophic failure of the turbine engine, which would have gone unnoticed using only dye penetrant testing.
Do you have an application for crack detection in metals or other materials? MoviTHERM offers a feasibility study testing service. This allows you to prove this method before investing in a Vibro-Thermography System.
Contact us today for a free consultation!
About MoviTHERM
MoviTHERM – Advanced Thermography Solutions was founded in 1999. The company offers solutions for plastic welding, package sealing, and non-destructive testing. In addition, MoviTHERM provides IoT Cloud monitoring solutions for thermal imaging applications for early fire detection, machine condition monitoring, and other applications. MoviTHERM is a Teledyne FLIR Premium Partner and master distributor for FLIR Thermal Cameras for automation and science applications.

