FLIR A6700 MWIR Camera + Complete Active Thermography System
FLIR A6700 MWIR Camera + Complete Active Thermography System
Guaranteed safe & secure checkout

*We also accept ACH/wire transfer, checks, and purchase orders.
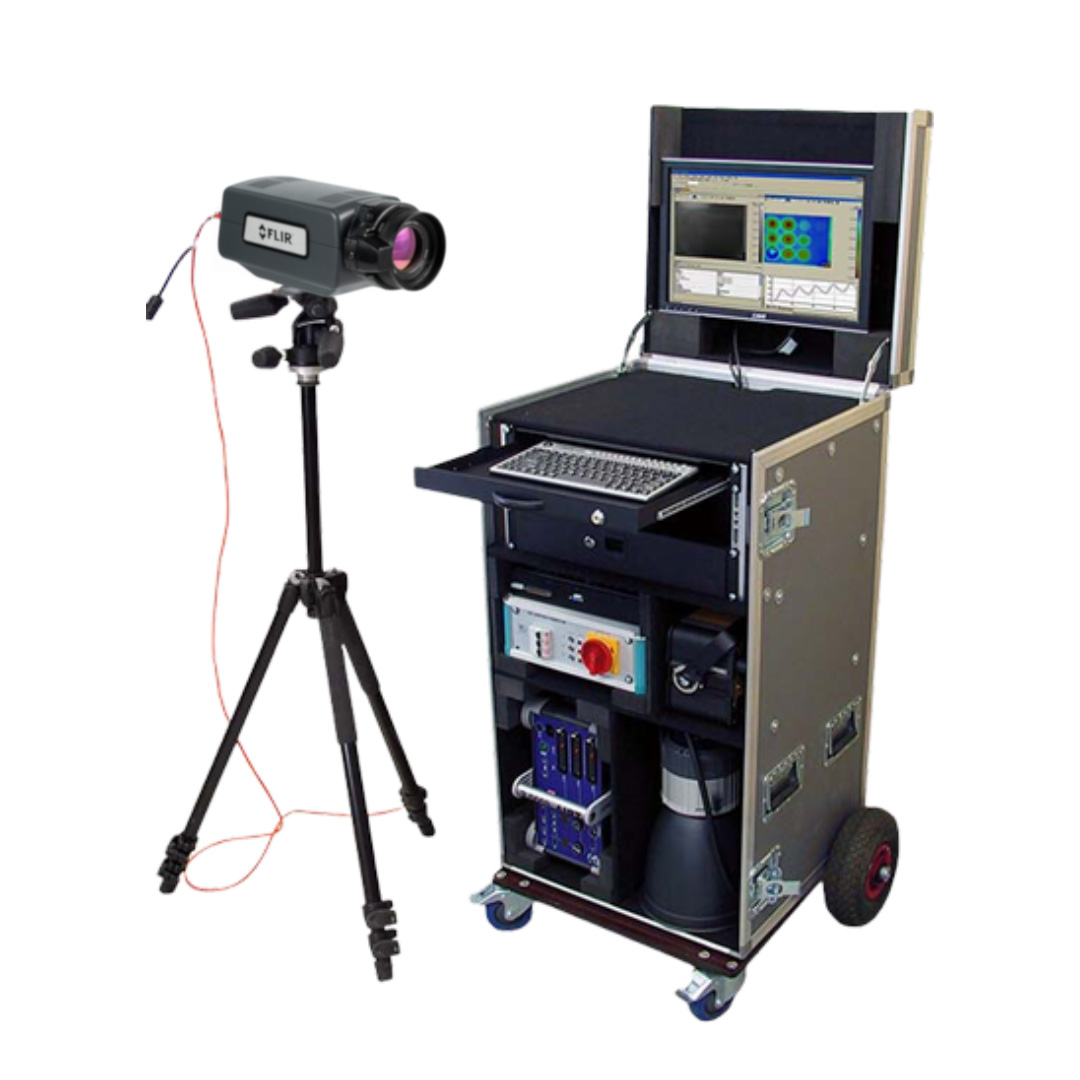
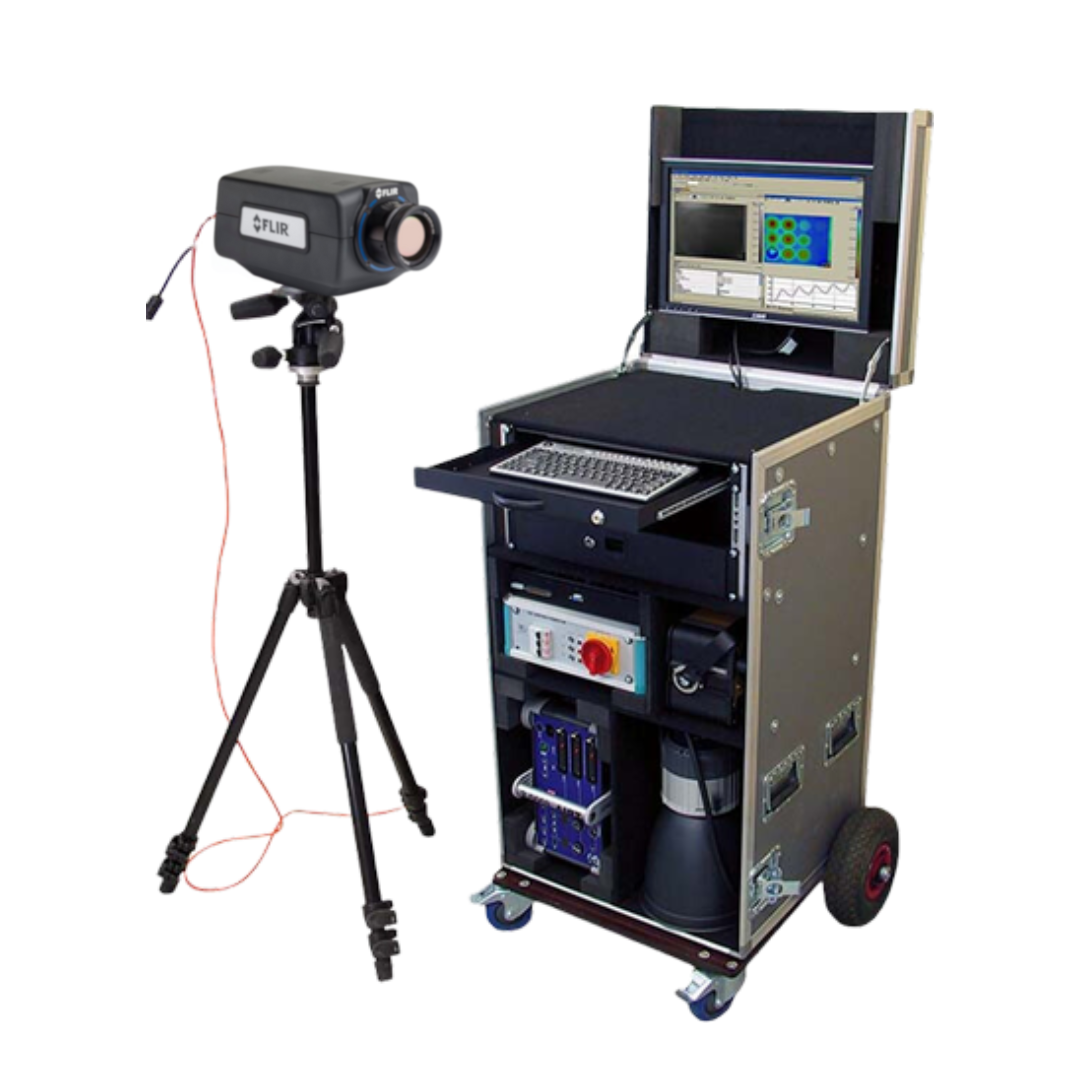
MoviTHERM’s FLIR A6700 MWIR Camera non‐destructive testing systems use active thermography for the reliable detection of delaminations, impact damages, “near side” defects, water inclusions, debondings, and other defects. The system achieves precise measurements and is ideal for inspecting composites, metals, semiconductors, microelectronics, batteries, ceramics, and more.
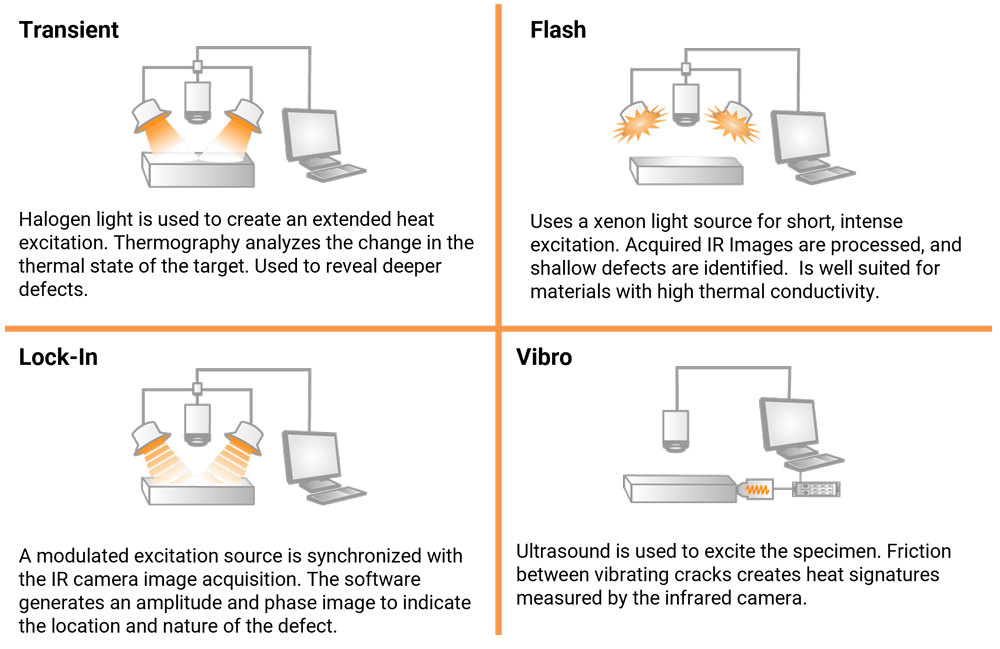
Our irNDT system accommodates a wide range of irNDT measurement methods, including: Flash‐Thermography, Lock‐In Thermography, Transient Thermography, and Vibro‐Thermography. It also works with multiple excitation sources and with cooled or uncooled infrared camera systems.
Documentation
Specifications
| FLIR A6700 MWIR Camera Specifications | |
|---|---|
| Resolution | 640 × 512 |
| Pixel size [square] | 15 µm |
| Spectral range | 1.0 – 5.0 µm |
| Detector type | FLIR indium antimonide (InSb) |
| Camera f-number | f/2.5 |
| Dynamic range | 14-bit |
| Frame rate [full window] | Programmable; 0.0015 Hz to 125 Hz |
| Integration time | 480 ns to ~full frame |
| Standard temperature range [with band matched optics] | -20°C to 300°C (-4°F to 572°F) |
| Optional temperature range [with band matched optics] | 45°C to 600°C/113°F to 1112°F (ND1); 250°C to 2000°C/482°F to 3632°F (ND2); 500°C to 3000°C/932°F to 5432°F (ND3) |
| Filter holder [warm] | Behind lens mount for standard 1 inch diameter filters |
| Focus | Manual |
| Imaging & Optical | |
| Sensor cooling | Closed-cycle rotary |
| Thermal sensitivity_NETD [typical] | ≤25 mK typical |
| Environmental & Certifications | |
| Detection zones | 40 g, 11 msec ½ sine pulse/4.3 g RMS random vibration, all 3 axes |
Description
FLIR A6700 MWIR Camera – Science-Grade MWIR InSb Camera
Designed for electronics inspections, manufacturing monitoring, scientific research, and non-destructive testing, the FLIR A6700 MWIR camera is ideal for high-speed thermal events and fast-moving targets. Short exposure times allow users to freeze motion and achieve accurate temperature measurements.
In fact, the camera’s image output can be windowed to increase frame rates to 480 frames per second to accurately characterize even higher speed thermal events, helping ensure critical data doesn’t get missed during testing.
- Crisp Thermal Images: FLIR A6700 operates in the 3.0–5.0 µm waveband (1.0–5.0 µm broadband option) and produces finely-detailed, 327,680 pixel images.
- Fast Integration Times: Snapshot mode lets you capture every pixel from a scene simultaneously, which is crucial to measuring temperatures of fast-moving object.
- Standard Video Interfaces: Gigabit Ethernet and analog video are simultaneously active yet independently controlled allowing greater flexibility for recording and display purpose.
Key Features:
- FLIR built cryo cooler and insb detector
- Excellent image quality: 640 x 512 pixels
- High sensitivity: <20 mk
- High speed image acquisition: up to 480 hz
- Synchronization with other instruments and events
- Wide choice of optics & extender rings
- Works with FLIR ResearchIR Max software
- Compatible with MathWorks® MATLAB software
About the Active Thermography System
MoviTHERM’s FLIR A6700 MWIR non‐destructive testing systems use active thermography for the reliable detection of delaminations, impact damages, “near side” defects, water inclusions, debondings, and other defects. The system achieves precise measurements and is ideal for inspecting composites, metals, semiconductors, microelectronics, batteries, ceramics, and more.
Our irNDT system accommodates a wide range of irNDT measurement methods, including: Flash‐Thermography, Lock‐In Thermography, Transient Thermography, and Vibro‐Thermography. It also works with multiple excitation sources and with cooled or uncooled infrared camera systems.
Features:
- Non‐contact irNDT
- Works with cooled and uncooled IR Cameras
- Compatible with multiple irNDT methods
- Effective even on low emissivity targets
- Modular hardware and software
- Configurable for different geometries and materials
What is Active Thermography?
Active thermography is an effective method for non-destructive testing of materials involving the induction of heat flow in a test object by external excitation. The heat flow within the test object is influenced by internal conditions and measured on the surface by an IR camera. This technique detects not only the smallest surface defects, but also internal structural defects under the surface.
Active vs Passive Thermography
Active and passive thermography are techniques used for detecting heat patterns and abnormalities in various applications. While passive thermography relies on naturally occurring temperature changes, active thermography introduces an external energy source to create thermal contrast.
How does the system work?
MoviTHERM’s modular irNDT system works by utilizing active thermography. A heat source provides the inspected material with a thermal excitation. The flow of thermal energy through the material has a direct effect on surface temperatures. The surface temperature is recorded over a certain time period with an infrared camera and analyzed by the irNDT software.
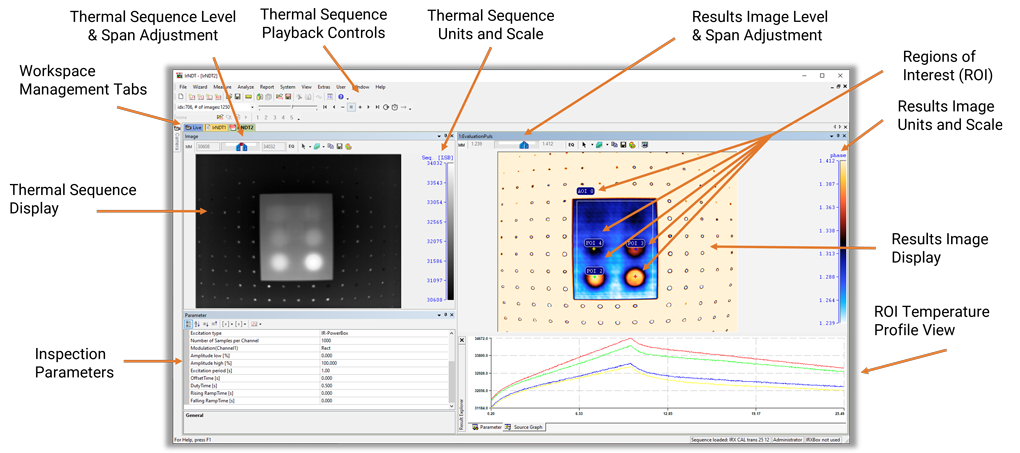
The software produces an image that provides information about the internal structure of the material.
- Non-Contact Defect Detection: Active thermography reveals the most subtle defects that are visibly undetectable.
- Flexible & Expandable: Upgrade a system by adding excitation sources, irNDT methods, and higher end IR cameras.
- irNDT Made Easy: Complex analysis technology is simplified for dependable inspection results.

The Software Interface


