Proper Ways to Power Up Your FLIR Cameras: A Step-by-Step Guide
Proper ways to power up FLIR (A50/A70/A400/A700) cameras: PoE and Direct Connection methods explained.
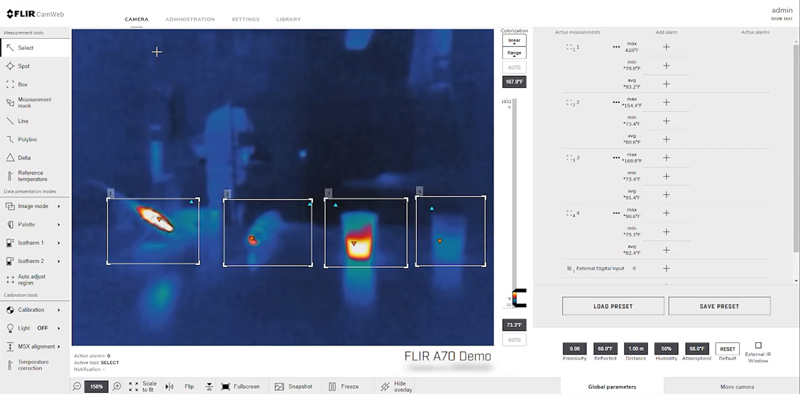
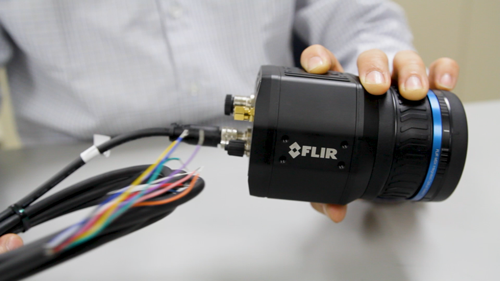
In this guide, we will discuss two methods of powering FLIR a50, a70, a400, and a700 cameras: Power over Ethernet (PoE) and Direct Connection. We will explain the materials required for each method, step-by-step instructions on how to connect and power the camera, and how to check if the camera is receiving proper power and functioning. So, whether you’re setting up a new FLIR a50, a70, a400, or a700 camera or troubleshooting an existing one, read on to learn about the proper ways to power up your FLIR camera.
Video Overview
Power Over Ethernet (PoE)
Materials required to run your camera using PoE include a FLIR camera, Ethernet cable, FLIR M12 to RJ45 Adapter Cable, and proper power input to the camera’s Ethernet port.
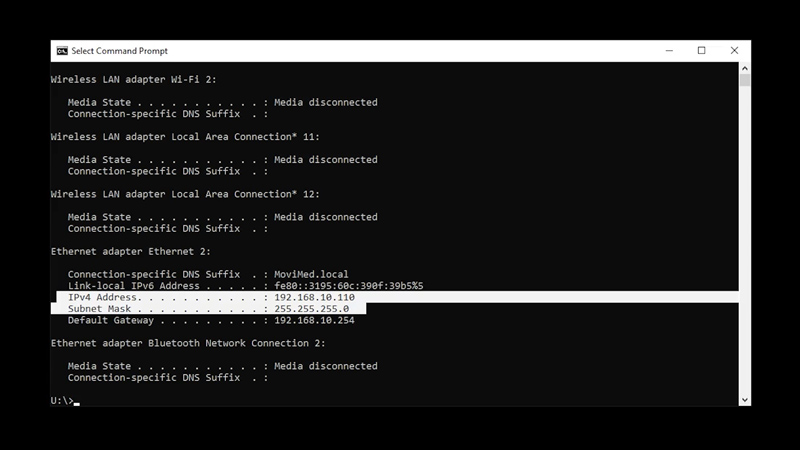
It is important to note that the camera must be connected to the output to receive power, while the input is used to connect to your network source.
Here are the steps to properly connect and power your camera using PoE:
- Connect the Ethernet cable to the adapter cable on the back of the camera.
- Connect the other end of the Ethernet cable to the PoE switch or injector.
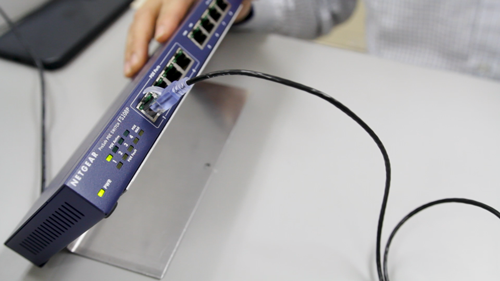
- Check the camera’s power/error indicator LED to verify that it is receiving proper power and functioning.
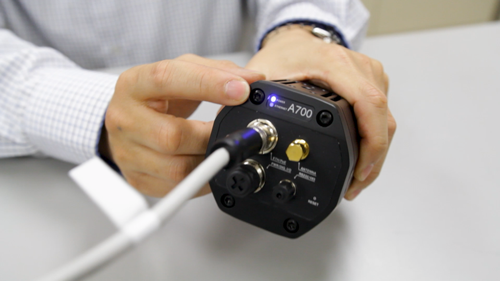
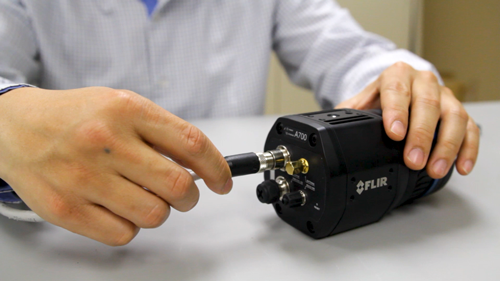
Power via Direct Connection
Materials required for power via direct connections include a FLIR camera, color-coded breakout cable to the M12 port, and a power supply providing 48 or 24 VDC.
Here are the steps to properly connect and power your camera via direct connection:
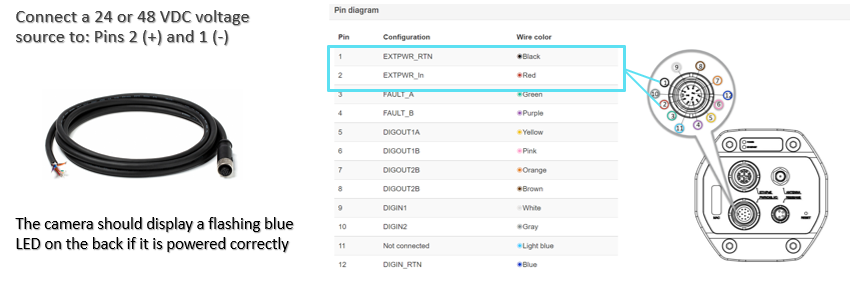
- Connect the color-coded breakout cable to the M12 port labeled PWR/DIG I/O.
- The other end of the cable has exposed wires that can be used to apply a voltage.
- Connect wires one and two to a 24 or 48 VDC power supply.
- Check the camera’s power/error indicator LED to verify that it is receiving proper power and functioning.
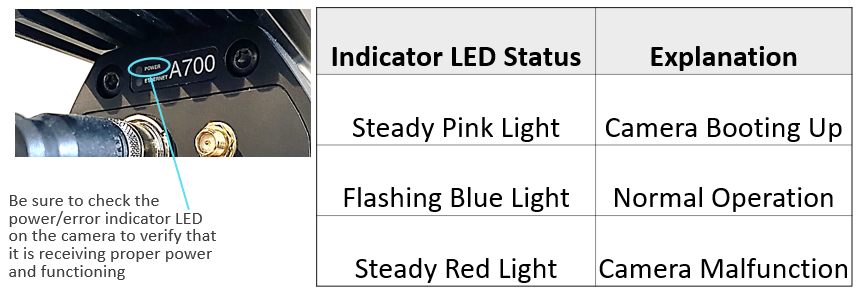
LED Indications and What They Mean
It is important to understand the different LED indications on your FLIR camera and what they mean. The power/error indicator LED indicates whether the camera is receiving proper power and functioning.
Here are the different LED indications and what they mean:
- Green LED: The camera is receiving proper power and functioning normally.
- Yellow LED: The camera is in the process of powering up or initializing.
- Red LED: The camera is not receiving proper power or is experiencing an error.
Conclusion
Properly powering up your FLIR camera is essential to ensure that it functions correctly. In this guide, we discussed the proper ways to power up your FLIR smart cameras, including power over Ethernet, power via direct connection, and the different LED indications and what they mean. By following these steps, you can ensure that your FLIR camera is receiving proper power and functioning as it should.