How to Add and Configure Automated Reports in the iTL Platform
Configuring Automated Reports on iTL: A Step-by-Step Guide
In this tutorial, we will explain how to add and configure automated reports on your iTL system. This feature is useful for monitoring and analyzing data over time, and you can schedule reports to be delivered to your email inbox at any time and frequency. By following the steps outlined in this guide, you can optimize your iTL system’s automated reporting capabilities to ensure that you receive timely and accurate notifications and reports, allowing you to stay on top of your operations and make informed decisions.
Video Overview
Configuring Notification Recipients
Any alert instance can send notifications via email, SMS, or voice call if enabled at the facility. These are configured in the notification tab of each alert. To do this, navigate to an alert that has been configured for a device and click on the notification tab.
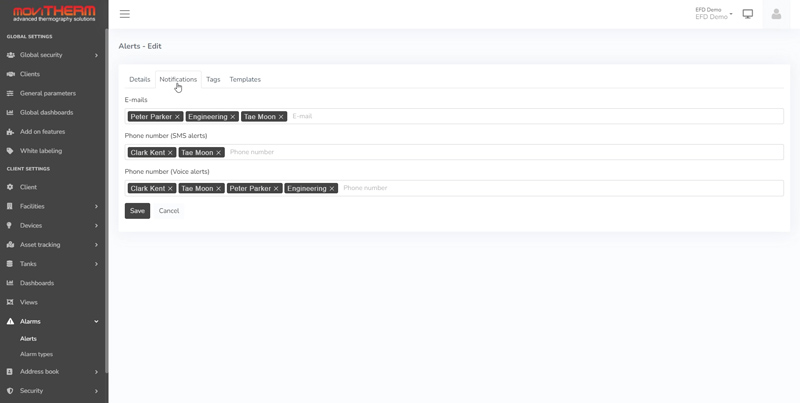
On this tab, you can enter emails, phone numbers for SMS alerts, and phone numbers for voice alerts. To save time, you can add contact groups and individual contacts saved in the address book section of the Settings tab.
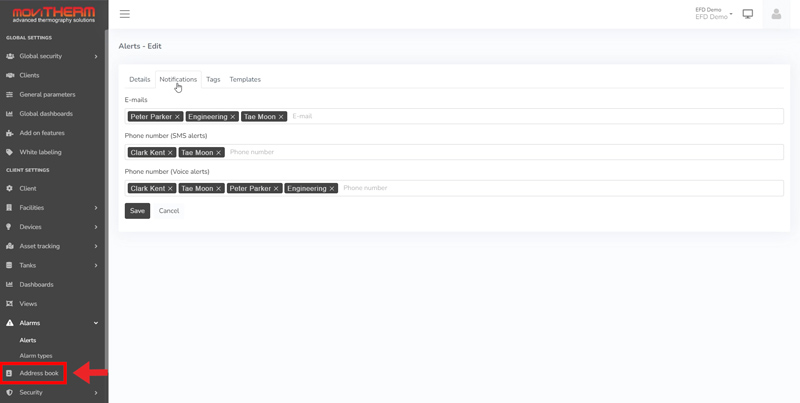
It’s important to know that contacts entered in an alert will be notified for that alert, which is configured for a single device.
Phone numbers should include the country code for both voice alerts and SMS.
Voice alerts, if enabled, may come from new phone numbers each time, depending on the region.
Voice alert phone calls do not leave voicemail, so it is recommended to pair voice alerts with an SMS alert.
Email notifications may appear in spam, so it’s recommended to whitelist notifications@cloud.studio.
Configuring Automated Reports
Report data can be saved as PDF or CSV using the download icon once the report has been executed with parameters.
To schedule a report delivery over email, click on the report section on the monitor page’s left side.
Select the favorite icon on the desired report to set up a report, then add it.
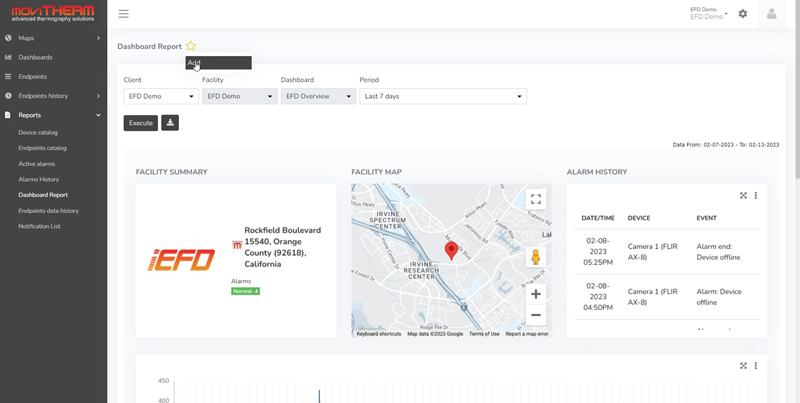
In the configuration screen, set up the relevant parameters and check “Enable scheduling for this report”.
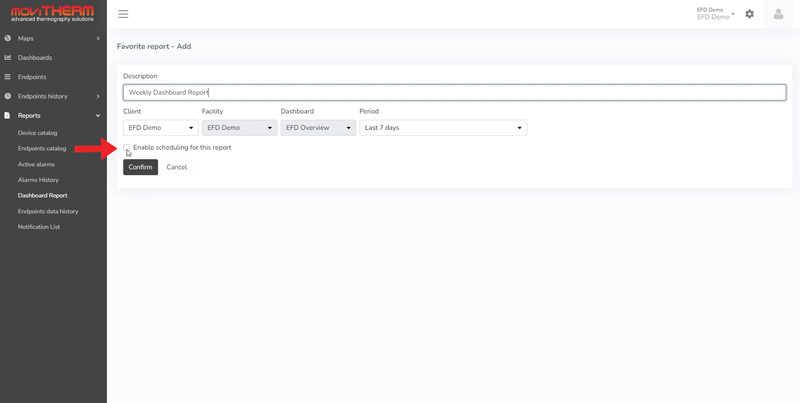
You will be able to select the type of file to export and schedule it for any day of the week and time.
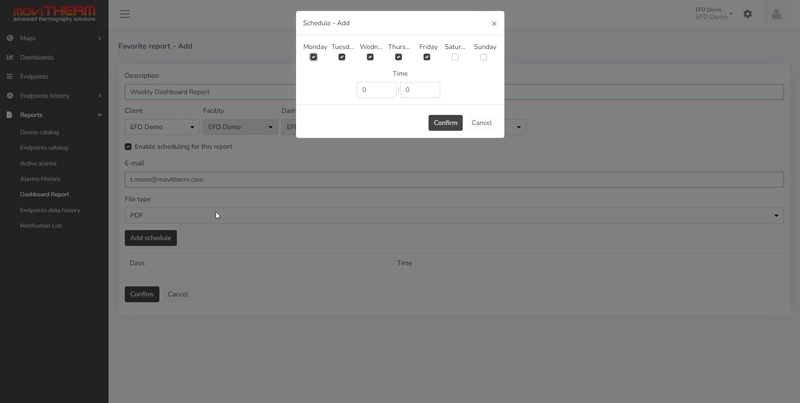
Multiple favorite reports can be created per alarm condition.
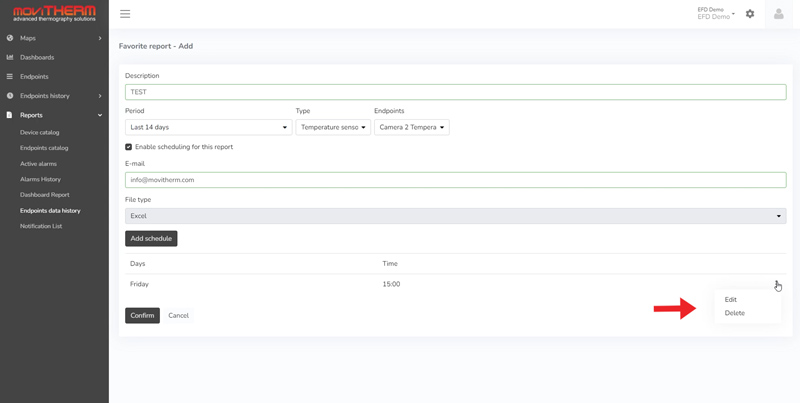
To delete or edit an automated report, select the favorite icon again, then click on the three dots on the right-hand side of the schedule.
Conclusion
We hope that this support article has provided you with the necessary information on how to add and configure automated reports in the iEFD platform. Remember, if you still need assistance or have further questions, our support team is always here to help. By following the tips and guidelines outlined in this article, you can ensure that you are using our product to its fullest potential and enjoying a seamless user experience.
If you have any questions or need assistance, please contact us at info@movitherm.com.

